“Document APIs using Spring Rest Docs”
August 16, 2022Throughout my experience in software development, I’ve learned that one of the main things to keep in mind is how the code we write will be tested. And not just that — it’s also crucial to ensure that the tests actually work as they should, rather than just creating tests to meet a code coverage percentage and avoid issues with Sonar rules 😅.
At some point, we’ve all written our own tests, and over time we’ve found strategies that help us develop them more effectively. However, I’ve also seen that when deadlines start to tighten in a project, two main things often happen:
- Testing is sacrificed (a decision that comes back to bite later)
- Developers are added to the project indiscriminately (a big mistake, especially when time is short)
Even if it might not seem like it, tests are an excellent way to document our code. But to do this properly, we need time to write them and a team with at least a basic understanding of the project. Otherwise, we’ll end up creating tests that only aim to meet a code coverage percentage. (In my opinion) 😅
As I mentioned earlier, a good way to document our code is through tests. And while there are other alternatives for documenting our APIs—such as Swagger or AsyncAPI in this case, I’ll rely on the Spring REST Docs project. It generates a document that describes the full functionality of our API in a very elegant and intuitive way.
Prerequisites
- Maven 3.6.X: https://maven.apache.org/download.cgi
- Java 11: https://www.oracle.com/java/technologies/downloads
- Intellij: https://www.jetbrains.com/idea/download
User service
To create our Spring Boot project, we go to https://start.spring.io/ and select the following configuration:

We add the Asciidoctor plugin First, we need to configure the Asciidoctor plugin, which will be responsible for collecting all the documents generated by our tests (snippets). The main properties to configure are: sourceDirectory, snippets, and backend.
sourceDirectory: The path where our base template will be located, which will be used to generate the API documentation.
snippets: The location where the snippets specified in each of our tests will be generated.
backend: The type of document that will be generated for our API documentation. Possible values are: spring-html, html and pdf.
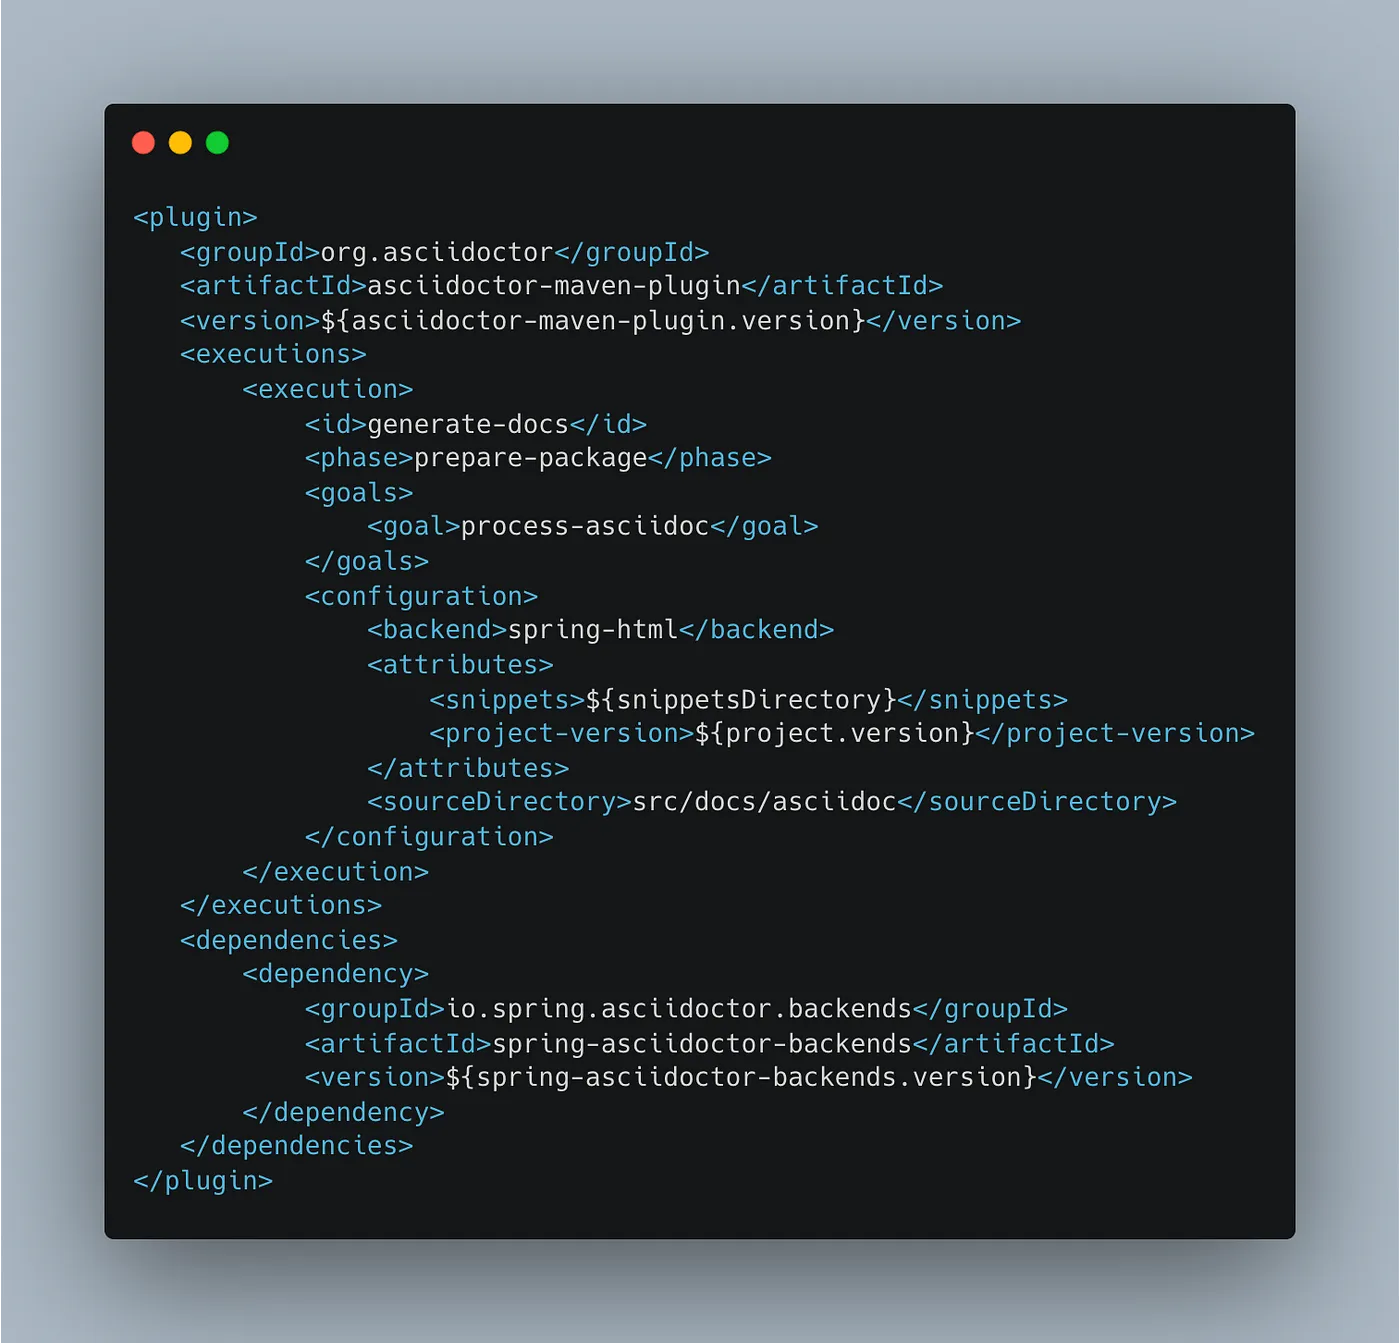
Tip: I replaced the spring-restdocs-asciidoctor dependency with spring-asciidoctor-backends in order to generate a document using a style proposed by the Spring team. You can check out the repository here.
UserController
For our service, we’ll create a few endpoints where we can perform CRUD operations on a user and their possible accounts. To keep the service development concise, I used H2 as an in-memory database and Spring JPA to easily handle all database operations, allowing us to focus on what really matters: the tests. But if you’d like to take a look at the code, you can check it out here.
UserControllerTest
As I mentioned at the beginning of this post, “Tests are an excellent way to document our code,” so in this case, we’ll use MockMvc to make example requests to our API. We’ll also use the ObjectMother pattern to represent our input and output data, which will serve as the contract our API must follow.
Retrieve user by ID
In this test, we retrieve a user’s basic information using their identifier and validate, using jsonPath, that the expected fields are present in the service’s response. So far, everything seems normal—but if we take a closer look at the pathParameters and responseFields methods, we’ll see that these are responsible for validating, through Spring Rest Docs, that the fields returned by the service are exactly the ones it’s supposed to return.

Note: The value user-by-id will be the name used to generate our snippets, so try to choose a name that clearly describes the purpose of what it does.
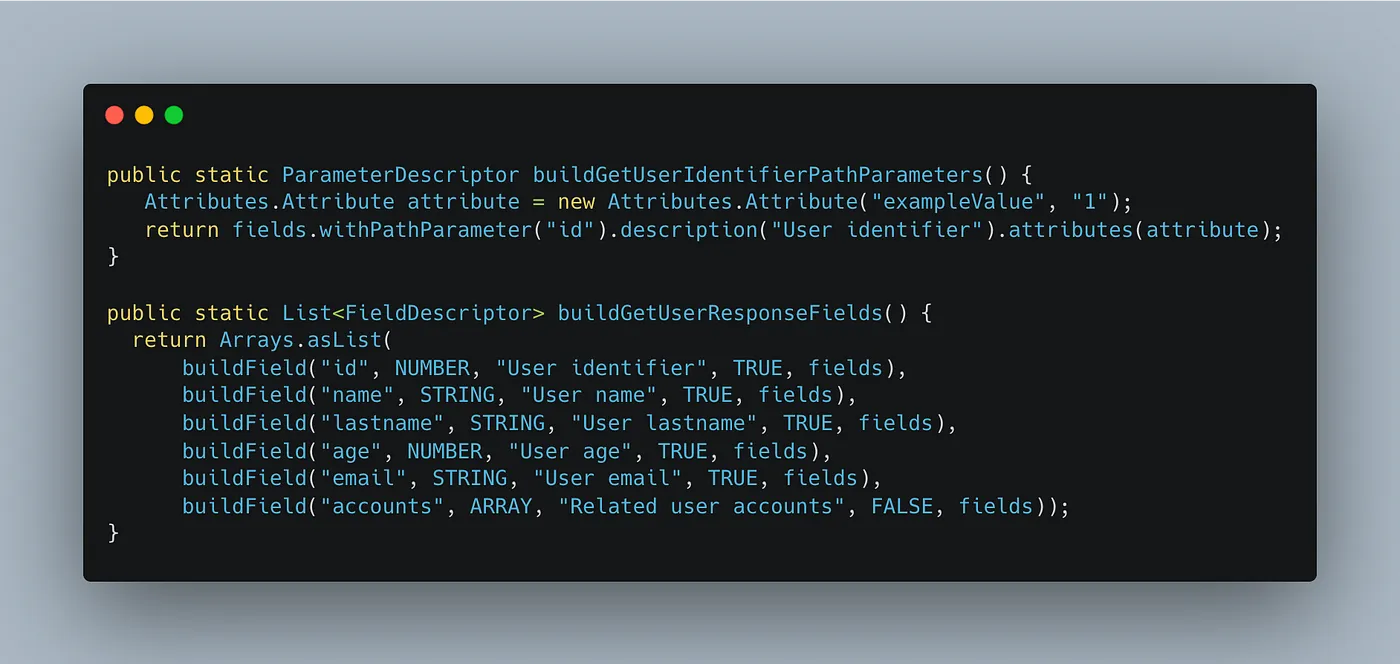
Note: The buildField method is a utility I used to avoid repeating the same configuration for the FieldDescriptor objects, which are used by Spring Rest Docs. If you’d like to see what this method does, you can check it out here.
Generated Snippets
Once we complete the previous configuration and run our tests, we’ll find all the generated snippets in the /target/generated-snippets directory, using the identifiers we specified.